Showing posts with label Tomorrow's Memories. Show all posts

Wednesday, March 25, 2015

Echo Park "Sunny Days Ahead" Layout Shares

There are some really fun new collections at Tomorrow's Memories right now and I got to play with "Sunny Days Ahead" from Echo Park.  Turn any rainy day into a memorable moment with this bright and happy collection.


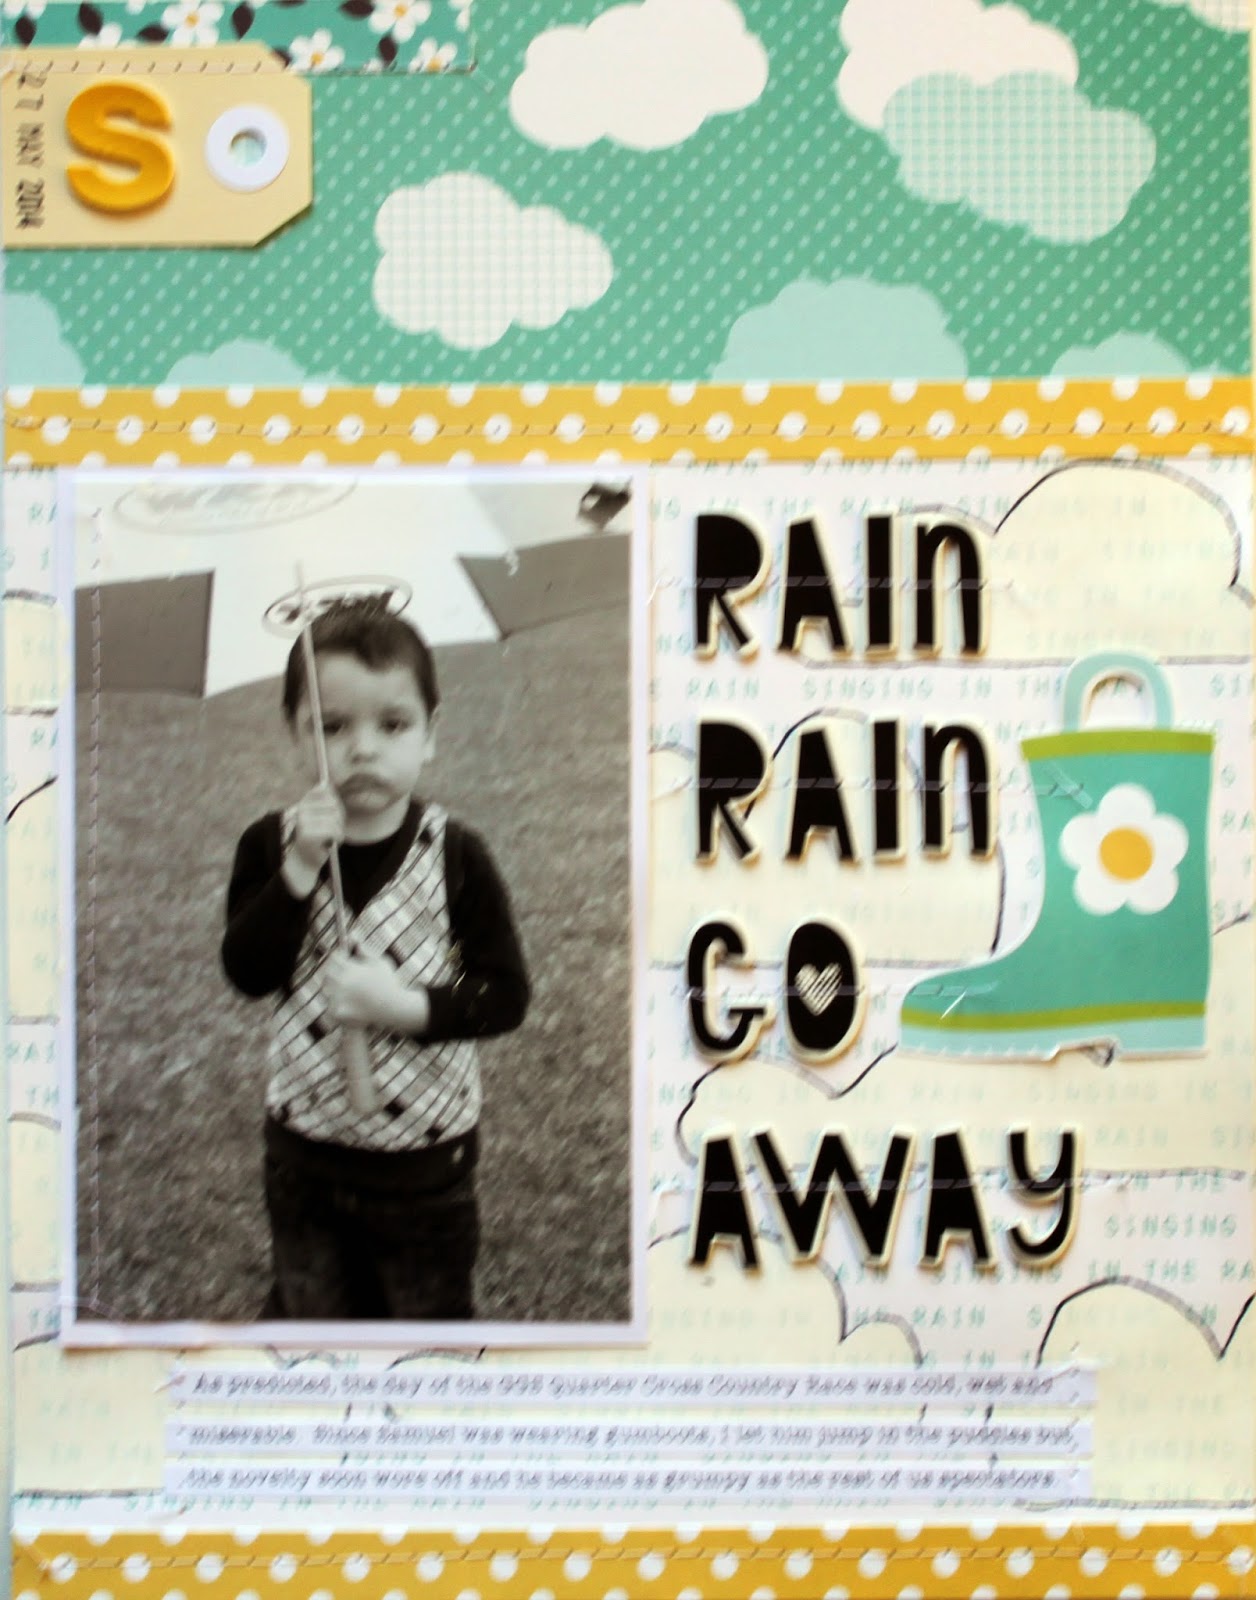
My first layout is an 8.5" x 11" and if you are familiar with my scrapping, you will know I love this smaller format.  I applied some gesso through a cloud stencil to slightly obscure the text paper and outlined the clouds with a black Sharpie.    The tag and alphas were from my stash and I fussy-cut the gumboot from one of the elements on the cut-apart paper sheet.


My next layout is a 12"x12" page and I love this one.  I cut the clouds from one of the paper sheets and punched triangles to create the banners.  I used one of the journalling cards from the cut-apart sheet to create both my title and a place for journalling.  Some enamel dots from my stash added the finishing touches rather than my usual ink splats.


Although I have created rain-themed layouts, the bright patterns could easily be used for any theme- think birthdays, parties or just summer fun!


Sunday, March 22, 2015

My Mind's Eye "Hello World" Layout Shares

I have some layouts to share using the new collections that have arrived at Tomorrow's Memories and today I have some shares using My Mind's Eye "Hello World".  Playful, vibrant, and comprised of primary colors with pop, this collection will give you wanderlust for sure!  Yes, it's a travel-themed collection, but I can see so many other uses for it too.  


My first layout is 12"x12" and I cut along the decorative feature on one of the papers to create my lower border.This is a great way to stretch your papers as I still have most of that sheet left to play with on another layout.  I cut apart another sheet to create my heart and geotag embellishments.  All I added was some stitching, twine and ink splats.


My next page is 8.5"x 11" and I used my die-cutting machine to create my large title.  You could easily recreate this by hand, or by adding letter stickers on top of the paper.  I just really wanted a big bold title.....I kept the cut letters in case I want to use them somewhere else.  This is a great way to use both the positive and negatives from your die-cutting.  


I added some sequins and wood veneers from my stash as well as twine, machine sttiching and ink splats.


Next up is another 8.5" x 11" page and this time I used the grid paper as my background.  I cut-apart another patterned paper to create the red embellishments.  I used my die-cutting machine to create my title, but again, letter stickers could be used instead.  I added a tag, a label and some wooden dots as well as my signature-stitching.


Thanks for stopping by!

Thursday, March 19, 2015

Kaisercraft "Off the Wall" Layout Video

I had some leftovers from my Tomorrow's Memories samples for Kaisercraft's "Off the Wall" Collection and thought I'd put together a quick page and record the process.


Here is my final layout.....


Here is a video showing how quick and easy this was to put together.....


You can watch it here, or over at YouTube. I hope you enjoy it!

Saturday, November 22, 2014

Your Creative Wings Chipboard

I would love to share a few projects I made using Your Creative Wings Chipboard, which is available now at Tomorrow's Memories.


Your Creative Wings is a family owned and run business, specializing in laser cut chipboard.  Their chipboard comes in a natural kraft finish and is 1.8mm thick.


To start with I made a set of three cards using the YCW Monsters 1 Set.....


I coloured my monsters with markers and combined them with papers from Kaisercraft's Something Blue collection and a really old stamp set from my stash.....


Next, I took a variety of chipboard from these sets.....


.....and added inks and embossing powders to create the colours and finishes I wanted,  combined them with papers from Kaisercraft's Pitter Patter Collection, to create this layout.....


I hope you will visit Tomorrow's Memories and grab some  Your Creative Wings Chipboard- it is great quality and there are so many different ways to use it!

Wednesday, November 19, 2014

Kaisercraft "Off the Wall" Layout Shares

I would love to share what I've been doing with the new "Off the Wall" Collection from Kaisercraft.  This is a new release for November and is a good one for showing off the boys in your life, and I was lucky to be asked to make some shop samples for Tomorrow's Memories.


I've been scrapping a lot of 8.5"x11" layouts lately and I have found that switching things up has really sparked my creativity in a very positive way.  I usually have about three "go-to" page designs that I use over and over again but designing on a smaller scale has forced me to try some new ways of setting up my layouts- give it a try next time you are feeling a bit stuck in a creative rut.


Here's my first layout- I used patterned papers and some stickers to create the foundation of my page, then added some machine stitching, ink splats and sequins for added texture.


Here is my second layout.  Once again I used patterned papers and stickers with machine stitching and ink splats, but I used enamel dots and twine too. I also curled up the edges of all my paper elements to "rough it up" a little.


"Off the Wall" is available at Tomorrow's Memories right now and you can also see these layouts on display if you would like a closer look. 

Monday, November 17, 2014

Webster's Pages "Nest" Layout Shares

Webster's Pages have been producing some stunning collections lately and "Nest" is their new gorgeous offering.  I was lucky enough to be asked to use these papers to create samples for Tomorrow's Memories.


Here is my first page- as soon as I saw the sheet of paper covered in doilies I knew I wanted to cut them up!  Here I've used them to mat my photo.  I kept this simple since the papers shine so brightly on their own, but I did add some ink splats here and there.


Here is my next page- back to my usual clean and simple style.  I cut up the journal card sheet to create blocks for my grid. 


I also used some of the vellum sheet to create a shaker box filled with blue and gold sequins in the bottom left hand corner. Please excuse my photo- it was a rushed phone photo!


Last of all I created a pocket page and cut pieces from the vellum sheet to add some transparency.  It looks great hanging up in the shop with the light shining through the gorgeous vellum.  I also created a shaker pocket with gold and silver sequins.  Here is a sneak- to see the whole page, you'll just have to pop in to the shop ;-)


Be sure to pop in to Tomorrow's Memoriesand grab some "Nest" and check out my projects!